고정 헤더 영역
상세 컨텐츠
본문
# clone darknet repo
!git clone https://github.com/AlexeyAB/darknet
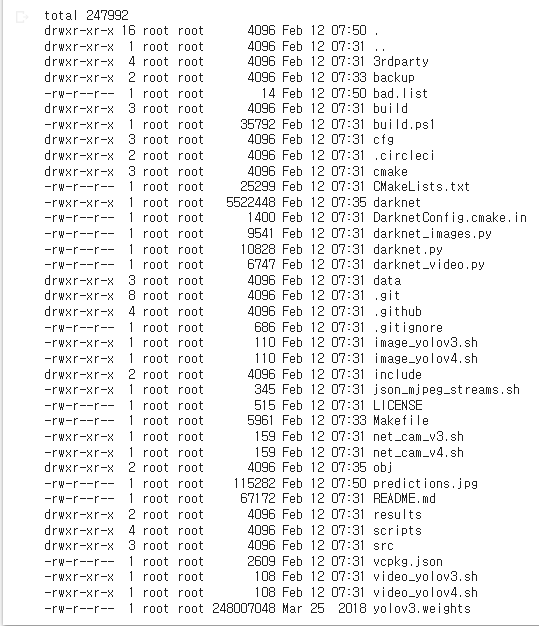
!ls -al darknet
%cd darknet
# change makefile to have GPU,OPENCV, CUDNN enabled
!sed -i 's/OPENCV=0/OPENCV=1/' Makefile
!sed -i 's/GPU=0/GPU=1/' Makefile
!sed -i 's/CUDNN=0/CUDNN=1/' Makefile
이 코드는 C++로 작성된 딥러닝 라이브러리인 Darknet을 설치하기 위한 명령어입니다.
sed는 스트림 에디터(stream editor)의 일종으로, 파일의 내용을 검색하여 바꾸는 등의 작업을 수행할 수 있습니다.
-i 옵션은 원본 파일을 변경한다는 의미입니다.
's/OPENCV=0/OPENCV=1/'는 Makefile에서 OPENCV 변수의 값을 0에서 1로 변경하는 명령어입니다. OPENCV는 이미지 및 비디오 처리를 위해 OpenCV 라이브러리를 사용할지 여부를 결정하는 변수입니다. 이 명령어는 OpenCV 라이브러리를 사용하도록 설정합니다.
's/GPU=0/GPU=1/'는 GPU 변수의 값을 0에서 1로 변경하는 명령어입니다. GPU를 사용하여 딥러닝 알고리즘을 실행할지 여부를 결정하는 변수입니다. 이 명령어는 GPU를 사용하도록 설정합니다.
's/CUDNN=0/CUDNN=1/'는 CUDNN 변수의 값을 0에서 1로 변경하는 명령어입니다. CUDNN은 NVIDIA에서 제공하는 딥러닝 라이브러리로, GPU에서 딥러닝 알고리즘을 더 빠르게 실행할 수 있습니다. 이 명령어는 CUDNN을 사용하도록 설정합니다.
#Compile Sources
!make
make 명령어는 Makefile을 실행하여 소스 코드를 컴파일하고 실행 파일을 생성합니다. Makefile은 소스 코드와 컴파일러 등의 정보를 담고 있는 설정 파일입니다. 이 명령어를 실행하면 Darknet 라이브러리를 사용할 수 있는 실행 파일이 생성됩니다.
# get yolov3 pretrained coco dataset weights
이 코드는 YOLOv3 딥러닝 모델의 미리 학습된 가중치 파일을 다운로드하는 명령어입니다.
wget은 URL로부터 파일을 다운로드하는 명령어입니다.
https://pjreddie.com/media/files/yolov3.weights는 YOLOv3 딥러닝 모델의 미리 학습된 가중치 파일이 저장되어 있는 URL입니다. 이 URL에서 yolov3.weights 파일을 다운로드합니다.
딥러닝 모델은 학습 데이터를 이용하여 학습을 진행하며, 학습이 완료된 모델은 가중치 파일로 저장됩니다. 이 가중치 파일은 학습된 모델을 불러오고 다양한 응용 프로그램에서 사용할 수 있습니다. 이 코드에서는 YOLOv3 모델을 사용하기 위해 미리 학습된 가중치 파일을 다운로드합니다.
import IPython
import numpy as np
min_confidence = 0.5
weight_file = 'yolov3.weights'
cfg_file = 'cfg/yolov3.cfg'
name_file = 'data/coco.names'
file_name = 'cabc30fc-e7726578.mp4'
!ls -al cfg/yolov3.cfg
# Load Yolo
net = cv2.dnn.readNet(weight_file, cfg_file)
classes = []
with open(name_file, 'r') as f:
classes = [line.strip() for line in f.readlines()]
print(classes)
['person', 'bicycle', 'car', 'motorbike', 'aeroplane', 'bus', 'train', 'truck', 'boat', 'traffic light', 'fire hydrant', 'stop sign', 'parking meter', 'bench', 'bird', 'cat', 'dog', 'horse', 'sheep', 'cow', 'elephant', 'bear', 'zebra', 'giraffe', 'backpack', 'umbrella', 'handbag', 'tie', 'suitcase', 'frisbee', 'skis', 'snowboard', 'sports ball', 'kite', 'baseball bat', 'baseball glove', 'skateboard', 'surfboard', 'tennis racket', 'bottle', 'wine glass', 'cup', 'fork', 'knife', 'spoon', 'bowl', 'banana', 'apple', 'sandwich', 'orange', 'broccoli', 'carrot', 'hot dog', 'pizza', 'donut', 'cake', 'chair', 'sofa', 'pottedplant', 'bed', 'diningtable', 'toilet', 'tvmonitor', 'laptop', 'mouse', 'remote', 'keyboard', 'cell phone', 'microwave', 'oven', 'toaster', 'sink', 'refrigerator', 'book', 'clock', 'vase', 'scissors', 'teddy bear', 'hair drier', 'toothbrush']
layer_names = net.getLayerNames()
output_layers = [layer_names[i[0] - 1] for i in net.getUnconnectedOutLayers()]
colors = np.random.uniform(0, 255, size=(len(classes), 3))
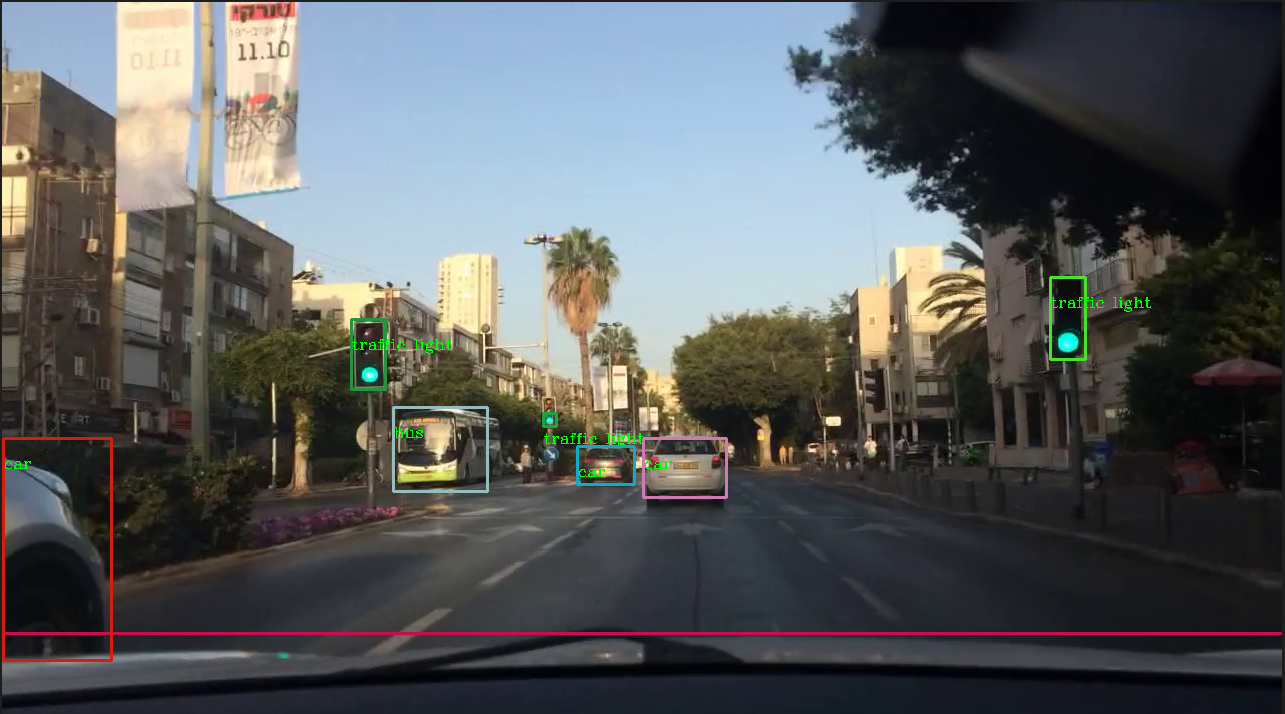
코드는 객체 감지(Object Detection)를 수행하는 딥러닝 알고리즘 YOLO의 결과물을 시각화하기 위한 코드입니다.
layer_names = net.getLayerNames()는 네트워크 모델에서 모든 레이어 이름을 가져옵니다.
output_layers = [layer_names[i[0] - 1] for i in net.getUnconnectedOutLayers()]는 모델의 마지막 레이어 중 출력이 필요한 레이어의 이름을 가져옵니다. YOLO에서는 마지막 레이어에서 출력되는 feature map이 객체 검출 결과입니다.
colors = np.random.uniform(0, 255, size=(len(classes), 3))는 클래스 수에 맞게 랜덤한 RGB 값을 생성하여 클래스별로 다른 색상을 부여합니다. 이후 감지된 객체마다 다른 색상의 박스를 그려서 시각화할 수 있습니다.
def detectAndDisplay(frame):
IPython.display.clear_output(wait=True)
height, width, channedls = frame.shape
blob = cv2.dnn.blobFromImage(frame, 0.00392, (416, 416), (0, 0, 0), True, crop=False)
net.setInput(blob)
net.setInput(blob)은 입력 이미지 또는 비디오 프레임을 딥러닝 모델의 입력 데이터로 설정하는 함수입니다.
blob은 이미지나 비디오 프레임을 전처리(pre-processing)하여 생성된 4차원 배열입니다. 딥러닝 모델에 입력되는 데이터는 일반적으로 이러한 전처리된 배열 형태로 제공됩니다.
딥러닝 모델은 입력 데이터를 받아 내부적으로 계산을 수행하여 예측 결과를 출력합니다. 이 때, net.setInput() 함수를 사용하여 입력 데이터를 설정하고, net.forward() 함수를 사용하여 모델의 예측 결과를 계산합니다. 딥러닝 모델의 입력 데이터를 설정하는 방법은 모델 및 라이브러리에 따라 상이할 수 있습니다.
outs = net.forward(output_layers)
class_ids = []
confidences = []
boxes = []
for out in outs:
for detection in out:
scores = detection[5:]
class_id = np.argmax(scores)
confidence = scores[class_id]
이 코드는 딥러닝 모델이 예측한 결과에서 객체 탐지 결과를 추출하는 역할을 합니다.
outs 변수는 net.forward(output_layers)를 통해 얻어진 딥러닝 모델의 출력 결과입니다. 이 출력 결과는 다차원 배열 형태로 나타나며, 각각의 원소가 객체 탐지 결과를 나타냅니다.
for out in outs: 구문은 outs의 각 원소에 대해 반복문을 수행합니다.
for detection in out: 구문은 out의 각 원소에 대해 반복문을 수행합니다. out의 각 원소는 탐지된 객체에 대한 정보를 담고 있습니다.
detection[5:]는 detection의 5번째 원소부터 끝까지의 범위를 선택하여 scores 변수에 저장합니다. 이는 해당 객체가 각 클래스에 속할 확률을 나타내는 원소들입니다.
class_id는 scores 배열에서 가장 높은 값을 가지는 원소의 인덱스를 선택합니다. 이는 탐지된 객체가 속한 클래스를 나타냅니다.
confidence는 scores 배열에서 class_id에 해당하는 원소를 선택합니다. 이는 탐지된 객체가 속한 클래스에 대한 신뢰도(confidence)를 나타냅니다.
if confidence > min_confidence:
# Object detected
center_x = int(detection[0] * width)
center_y = int(detection[1] * height)
w = int(detection[2] * width)
h = int(detection[3] * height)
# Rectangle coordinates
x = int(center_x - w / 2)
y = int(center_y - h / 2)
boxes.append([x, y, w, h])
confidences.append(float(confidence))
class_ids.append(class_id)
indexes = cv2.dnn.NMSBoxes(boxes, confidences, min_confidence, 0.4)
font = cv2.FONT_HERSHEY_COMPLEX
for i in range(len(boxes)):
if i in indexes:
x, y, w, h = boxes[i]
label = str(classes[class_ids[i]])
print(i, label)
color = colors[i]
cv2.rectangle(frame, (x, y), (x + w, y + h), color, 2)
cv2.putText(frame, label, (x, y + 30), font, 0.5, (0, 255, 0), 1)
cv2_imshow(frame)
#-- 2. Read the video stream
cap = cv2.VideoCapture(file_name)
if not cap.isOpened:
print('--(!)Error opening video capture')
exit(0)
while True:
ret, frame = cap.read()
if frame is None:
print('--(!) No captured frame -- Break!')
break
detectAndDisplay(frame)
'자율주행 > 컴퓨터 비젼 프로젝트(python)' 카테고리의 다른 글
| 자동차 추적, 탐지 프로젝트 (2) | 2023.02.15 |
|---|---|
| 차선 인식과 자동차 인식 동시에 하기 프로젝트 (0) | 2023.02.14 |
| kaggle 교통 표지판 데이터로 교통 표지판 인식하기 (0) | 2023.02.12 |
| OpenCV LaneDetection프로젝트 (0) | 2023.02.11 |
| YOLOv3 알고리즘, haar cascade 방식으로 번호판 식별하기 (0) | 2023.02.11 |


